HEADSHOT VS. SNAPSHOT


headshot-007

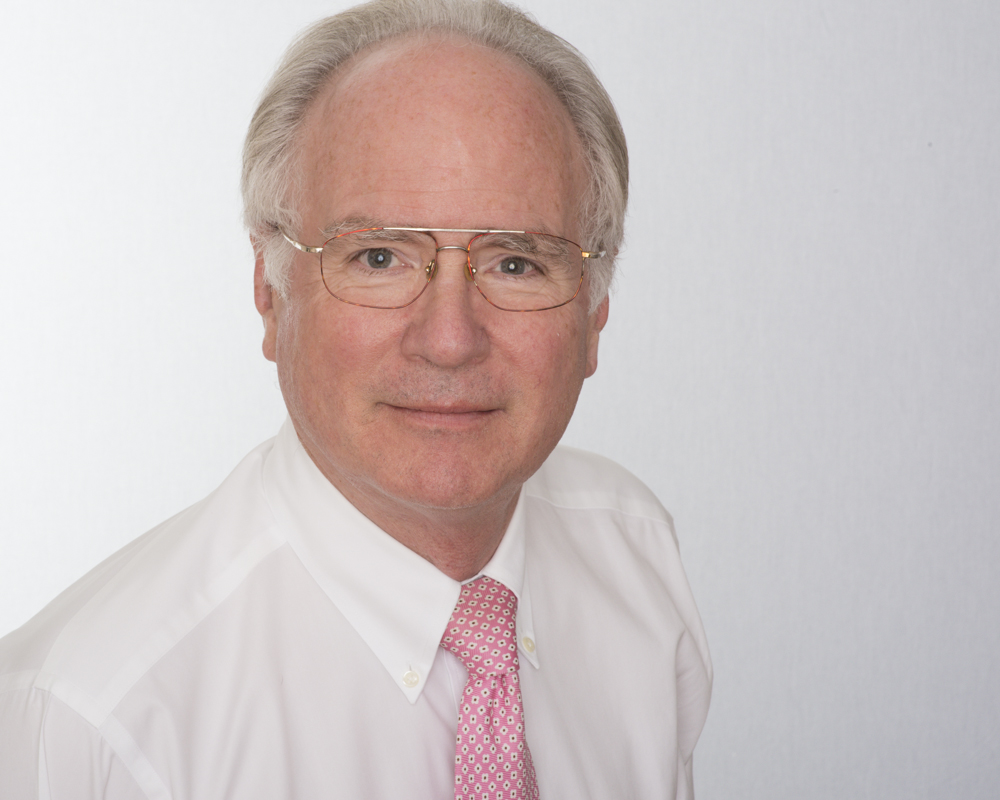
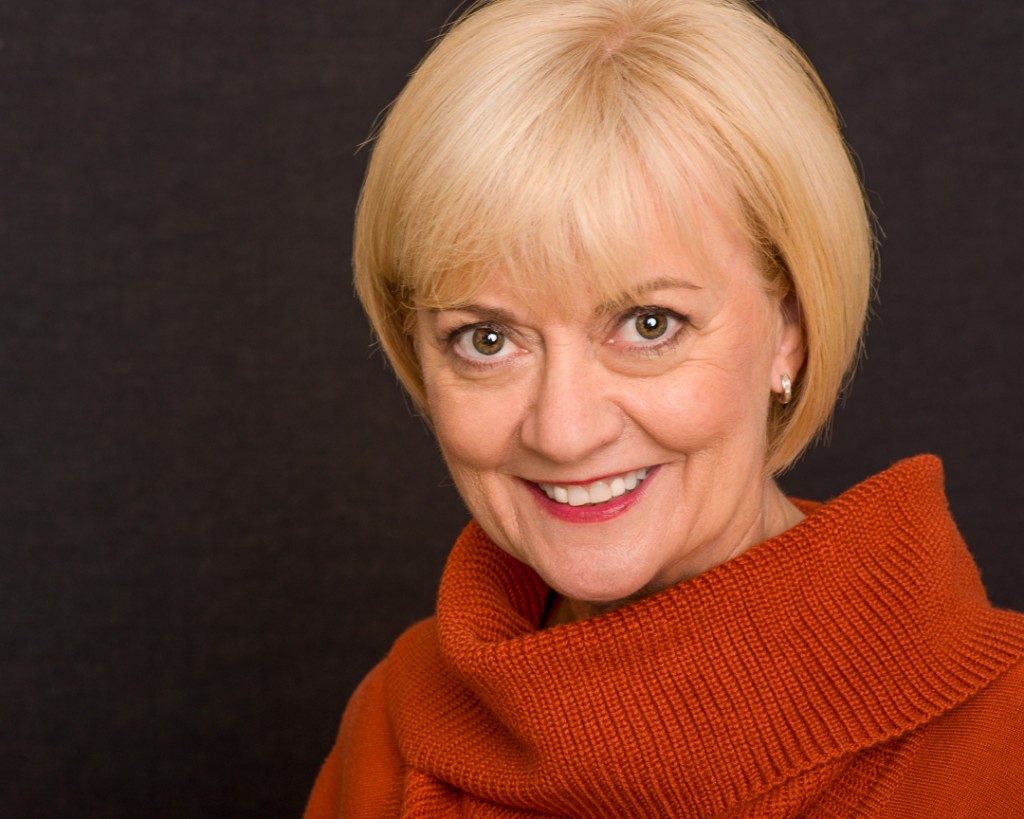
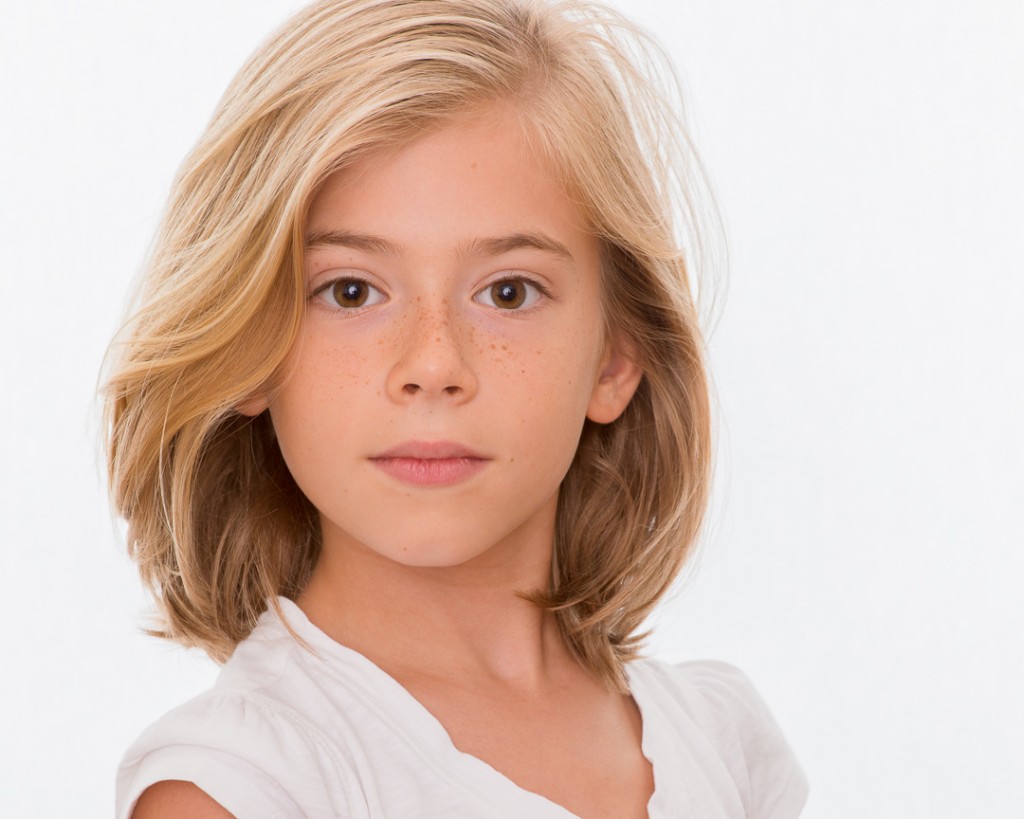
I have had recent requests for headshots from clients not understanding what a headshot really is and what goes into creating a good headshot. Their thoughts were they would “stop by” and get what they wanted in 5 minutes. A snapshot can be taken in less than 5 minutes but not a good headshot.

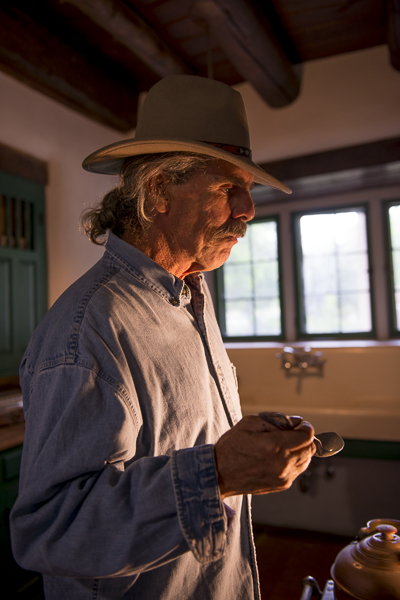
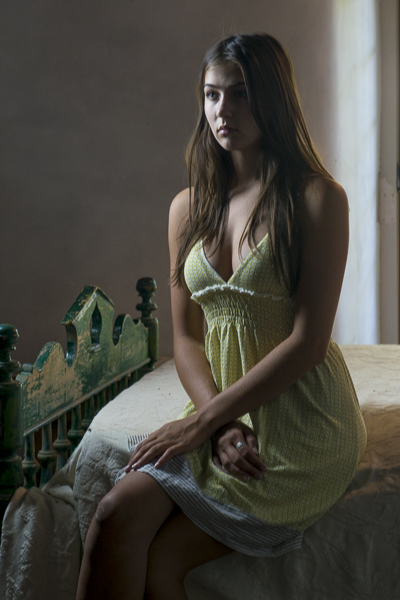
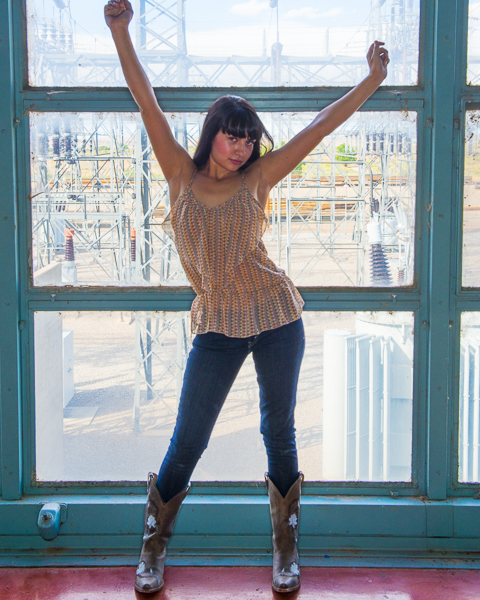
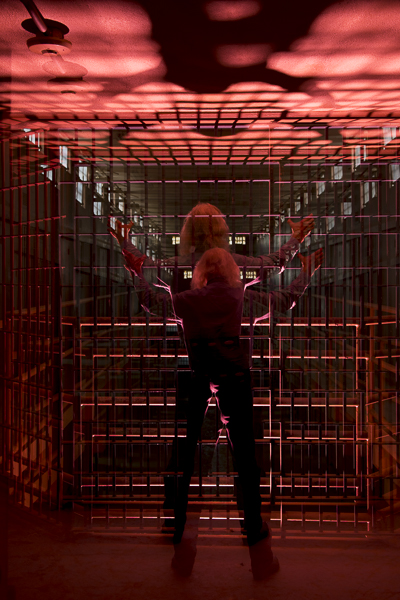
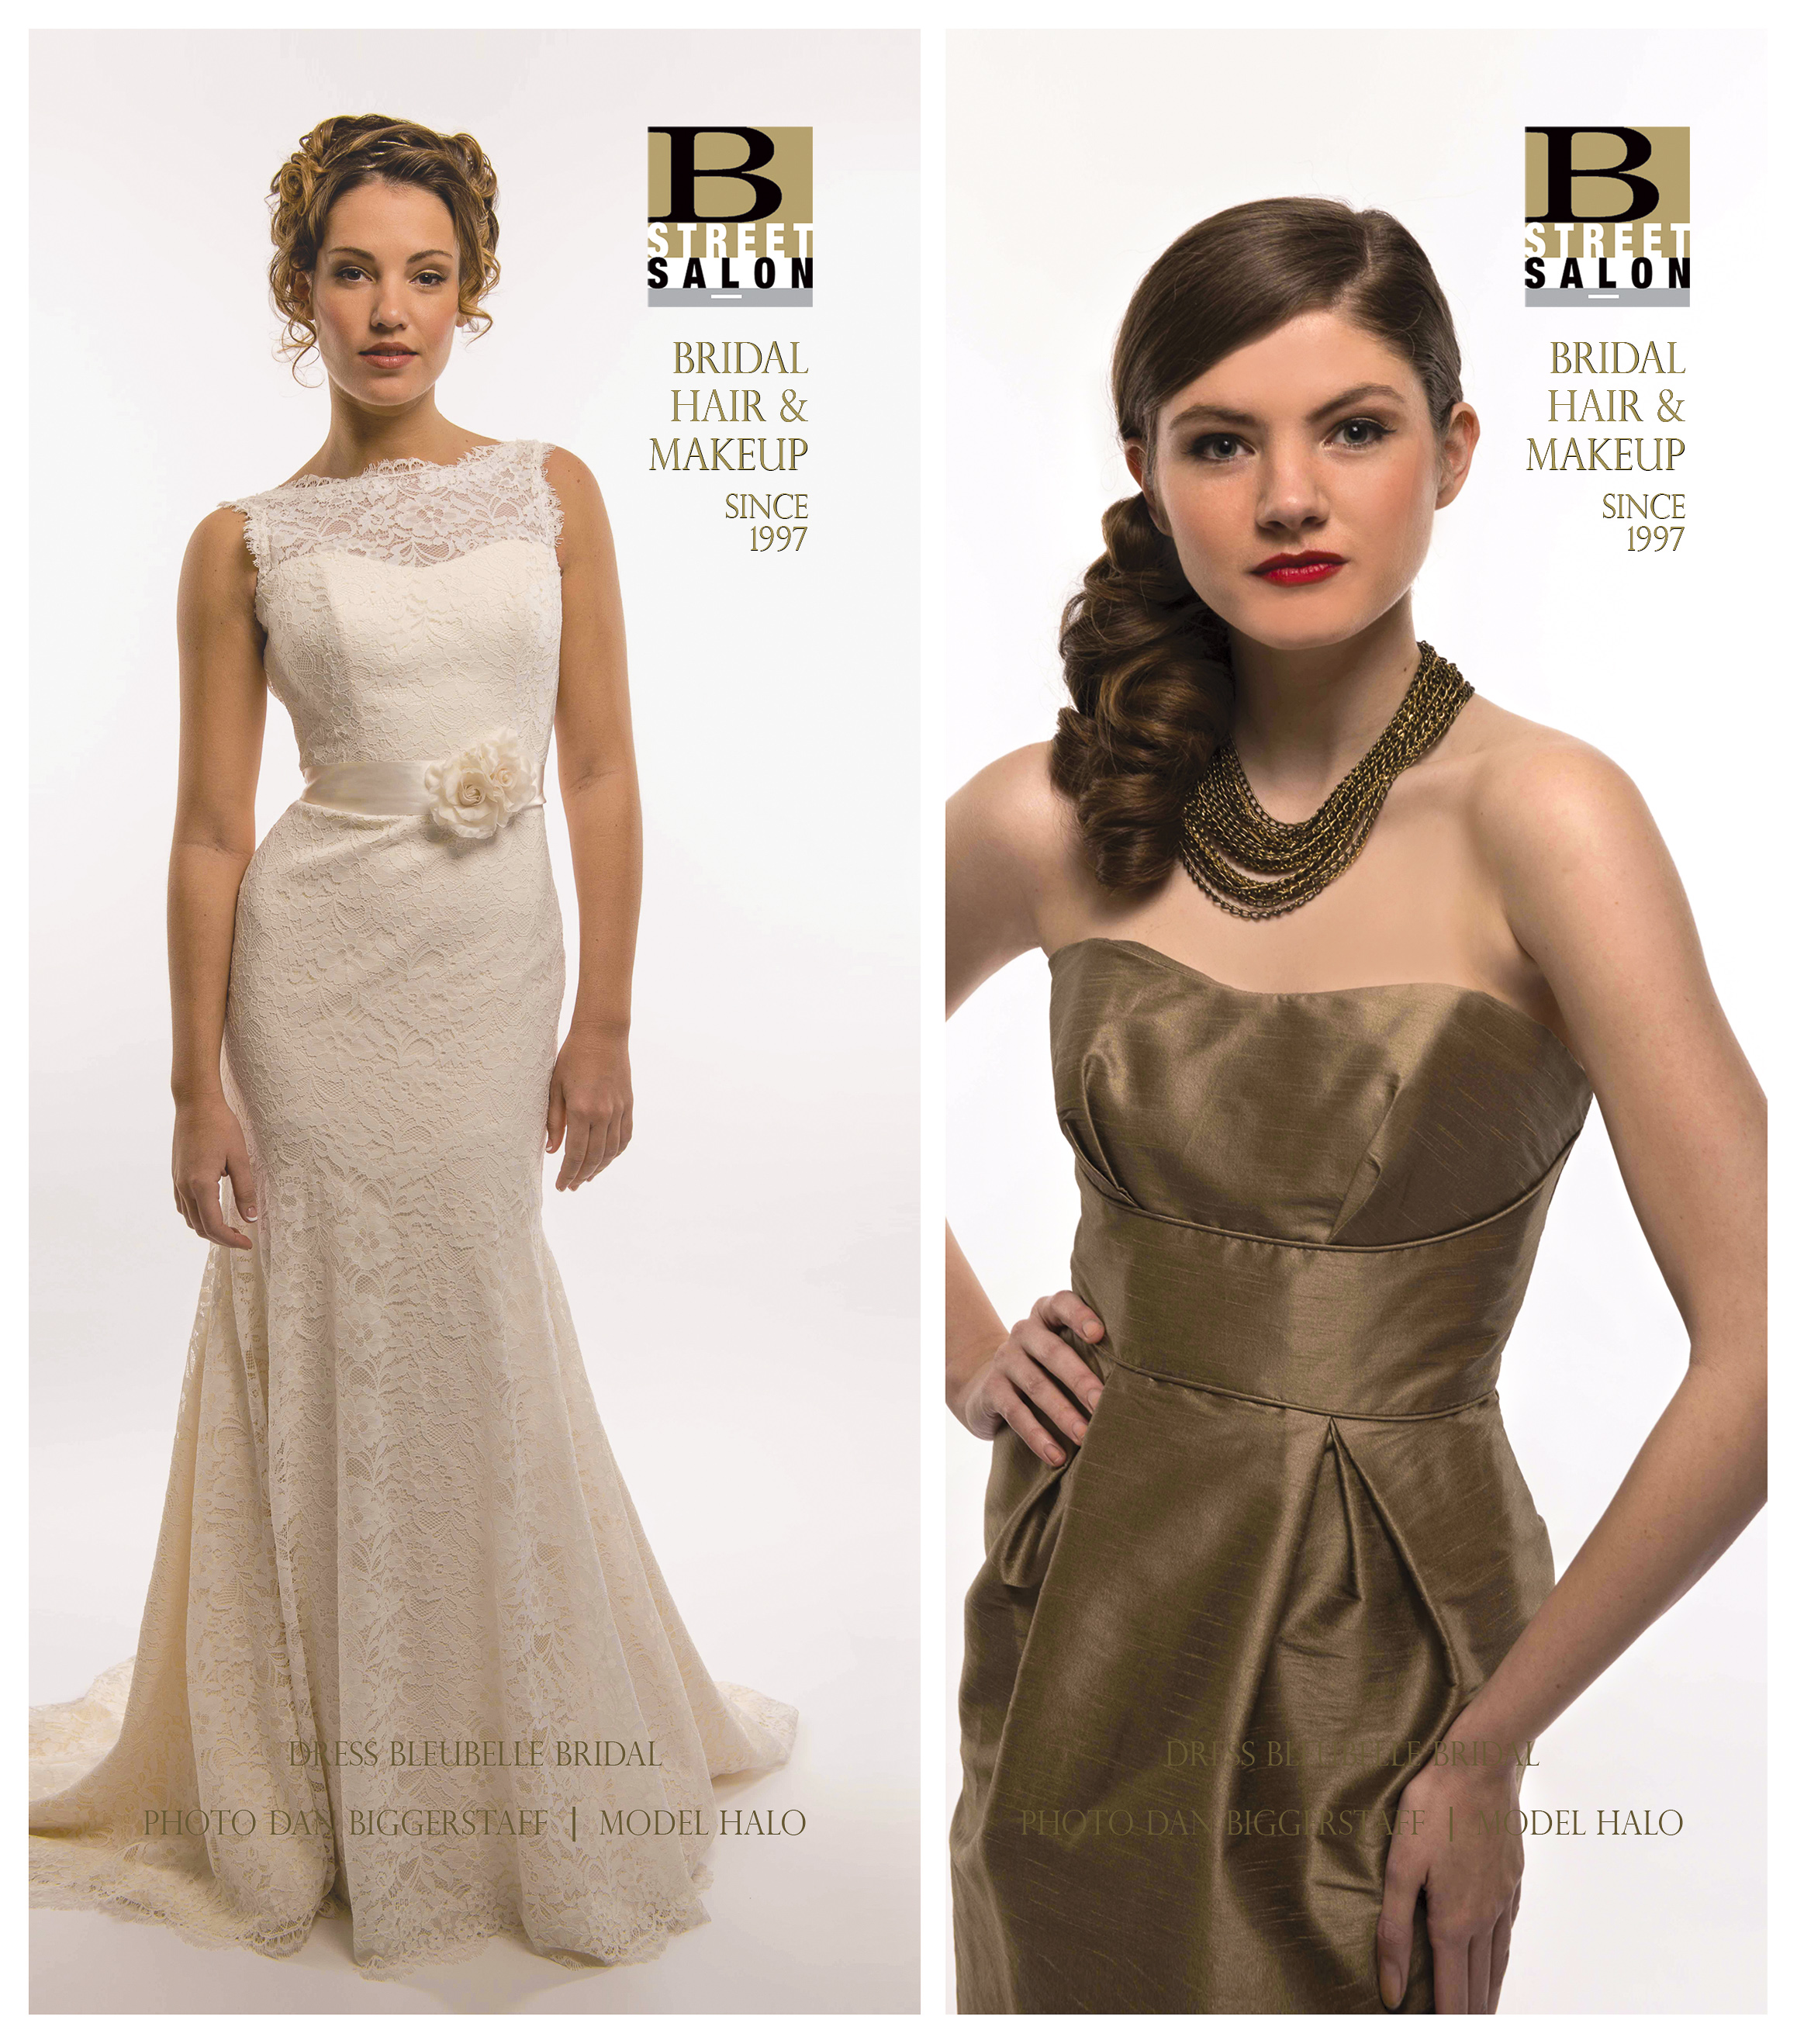
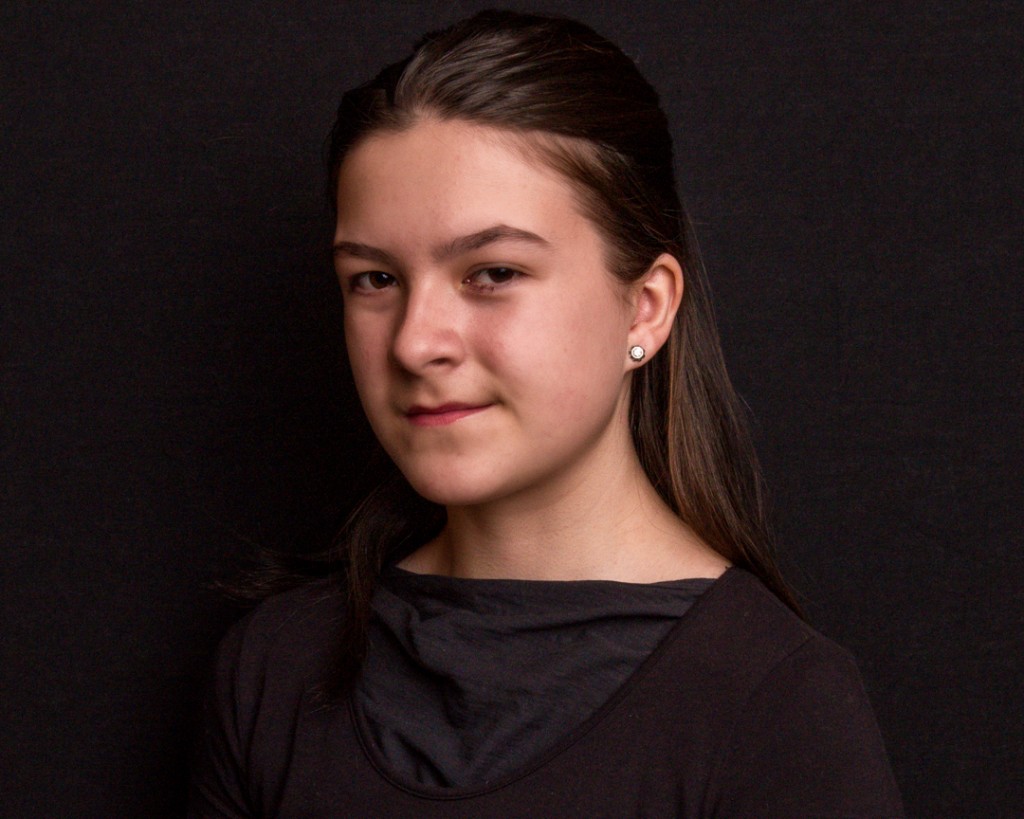
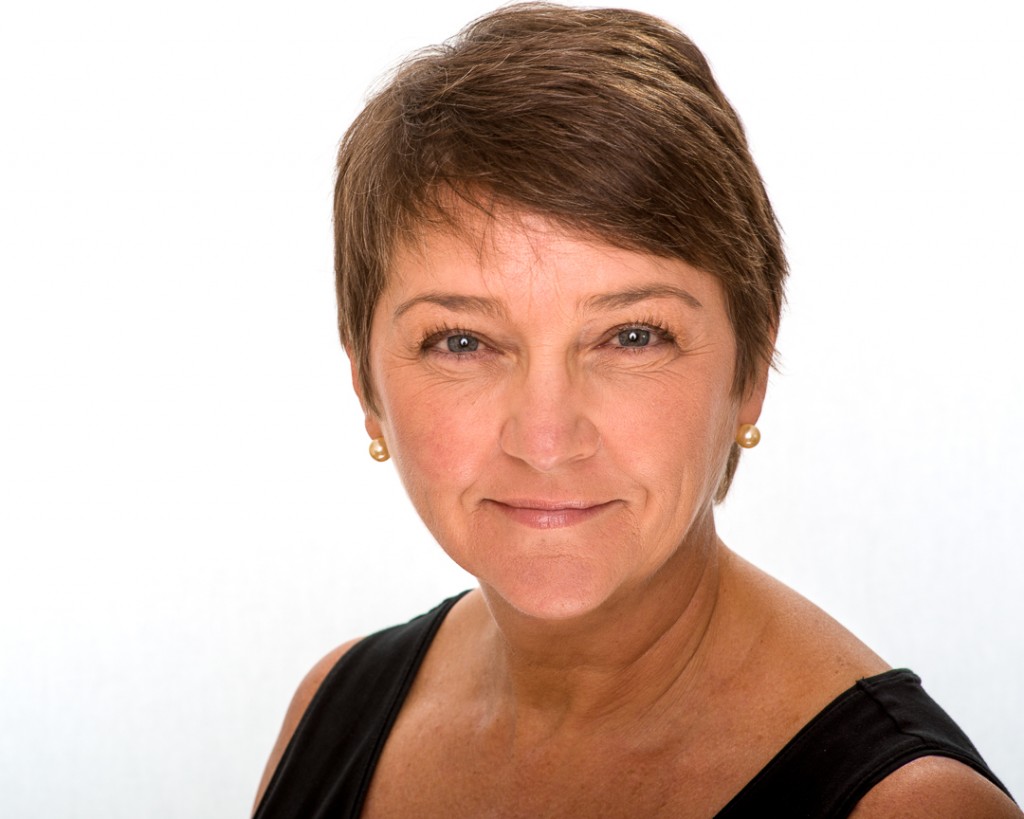
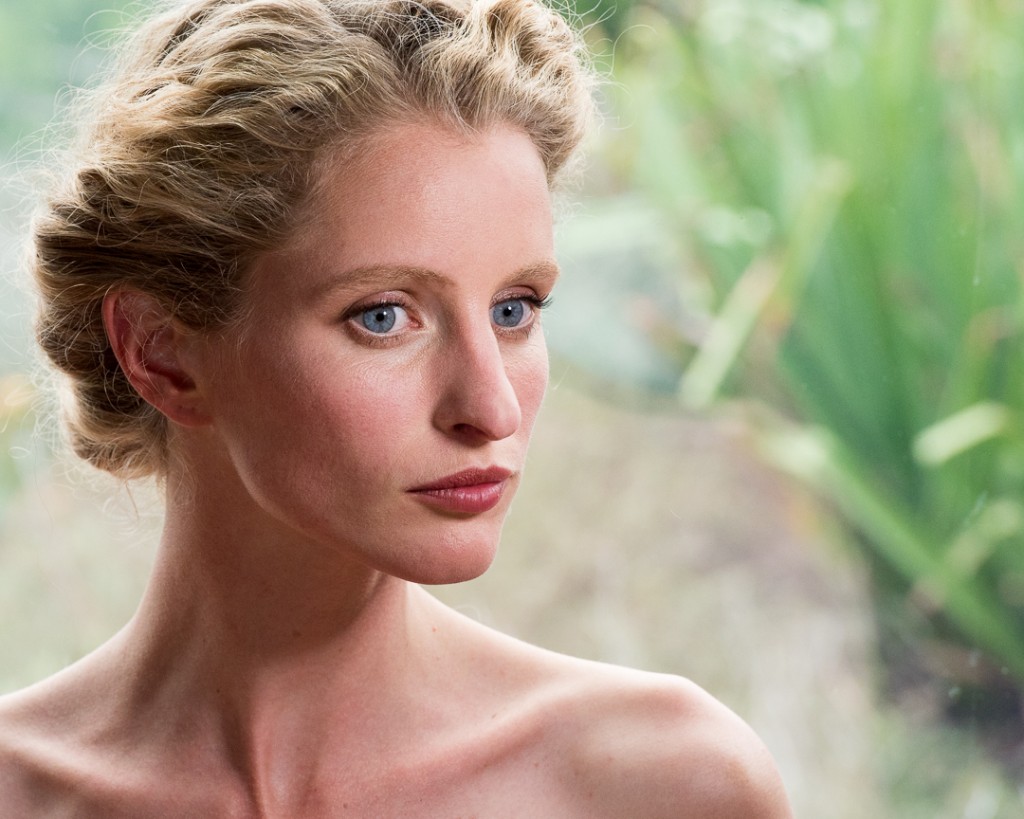
A headshot should say something about who the person is and should be something they can use, proudly, for years to come. The technical aspects of the photograph include the lighting, the camera, and the background. Lighting can be ambient but is more easily controlled with flash, either off-camera speedlight or studio flash, both used with modifiers to control the quality and spread of the light. Today’s high-resolution DSLR cameras provide the ability to capture exquisite photos that may be used on social media or blown up for larger portraits. In a good headshot, you can see individual eyelashes – almost scary, but in a way, elegant. Most headshots are taken in color and can be easily converted to black and white if preferred. The background in most headshots should be “neutral” and not pull the eye away from the face. The most frequently used backgrounds in headshots are white or black backdrops, although any solid color may be chosen. Natural backgrounds may be chosen and can range from almost any wall or structure to landscapes. Lens-choice and setting on the camera can allow complete blurring of the background to eliminate distractions from the face – this is called bokeh.

Subject preparation is of utmost importance and includes clothing and accessory choices in addition to hair and makeup. Frequently during a headshot session, she (or he) will do one or two wardrobe changes. It is best to stay away from bold patterns which would take the onlooker’s eye away from the face to the clothing itself. The same thing applies to jewelry which should be subtle or not worn at all – bright areas in the photograph pull the eye away from the face. Ideally, hair and makeup will be done by a professional who is aware of the nuances that look good in a photo. For instance, blemishes should not be caked with makeup but can easily be eliminated in post-production editing.

The headshot photo session in my hands usually takes an hour or so, sometimes less and sometimes more. This allows time for wardrobe, lighting, and background change – sometimes there will be makeup touchup. Ideally a stylist will be present during the shoot to make any adjustments that are needed. With all of the components completed, the actual shoot begins. Most people do not like having their photo taken, but with a professional photo shoot love the results. After the shoot is over, I would guess that 90-95% of my clients say the shoot was fun. It usually takes a few minutes to relax in front of the camera, although some get great photos early in the process. Very subtle changes in expression and head and shoulder position are directed by the photographer that result in the desired look.

Post shoot editing typically takes a couple of hours. After this the photos are ready for viewing and use/printing. Now that you know what is involved in getting a great headshot, the obvious question is cost. A friend of mine in NYC who is nationally known gets $2,000 per session, in addition to the fee for hair and makeup on location. Savannah is not NYC and the fees charged by the pros are usually $350-$700. With SCAD in town, you can find headshots for less than this, but you get what you pay for.

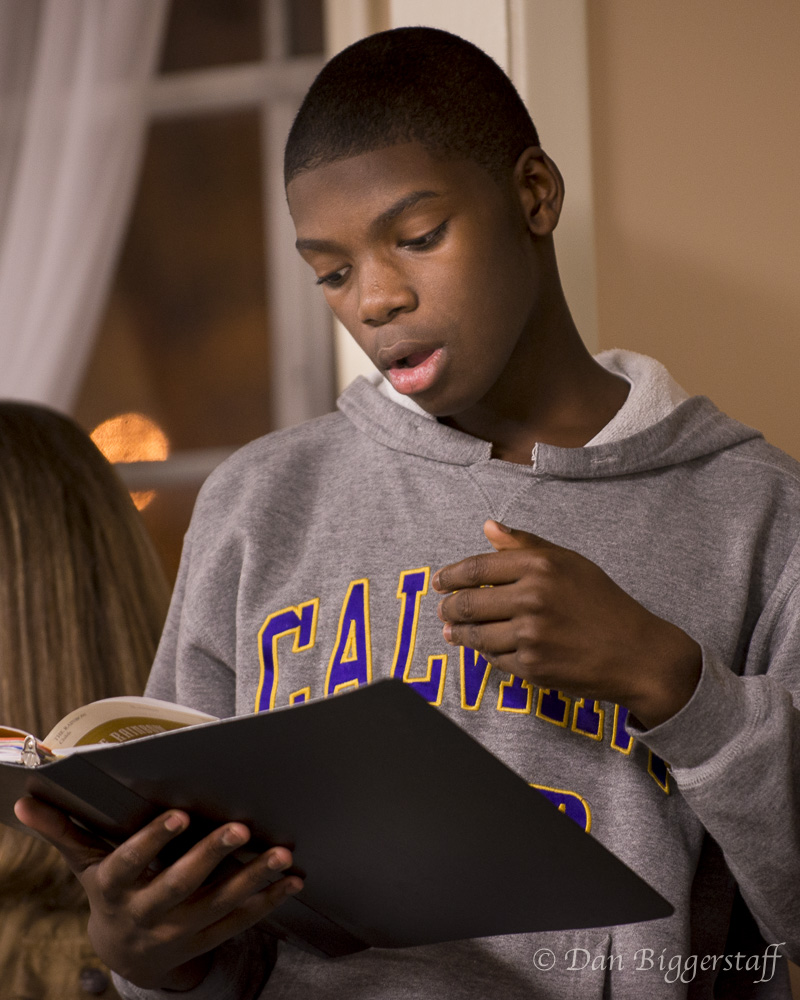
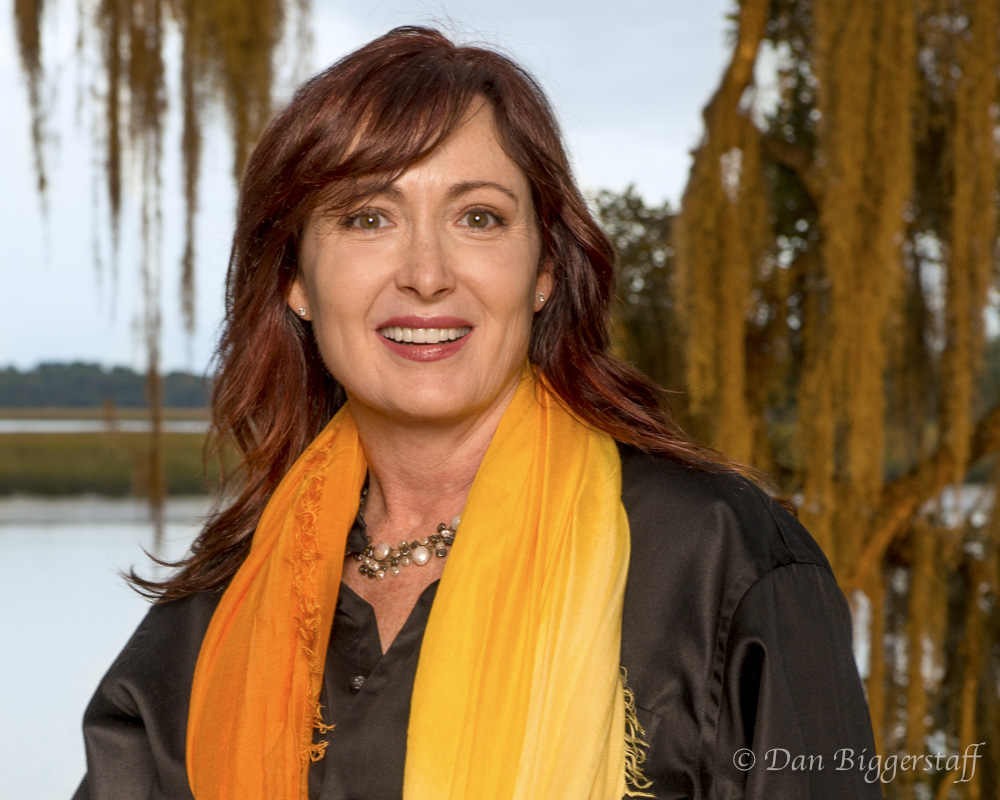
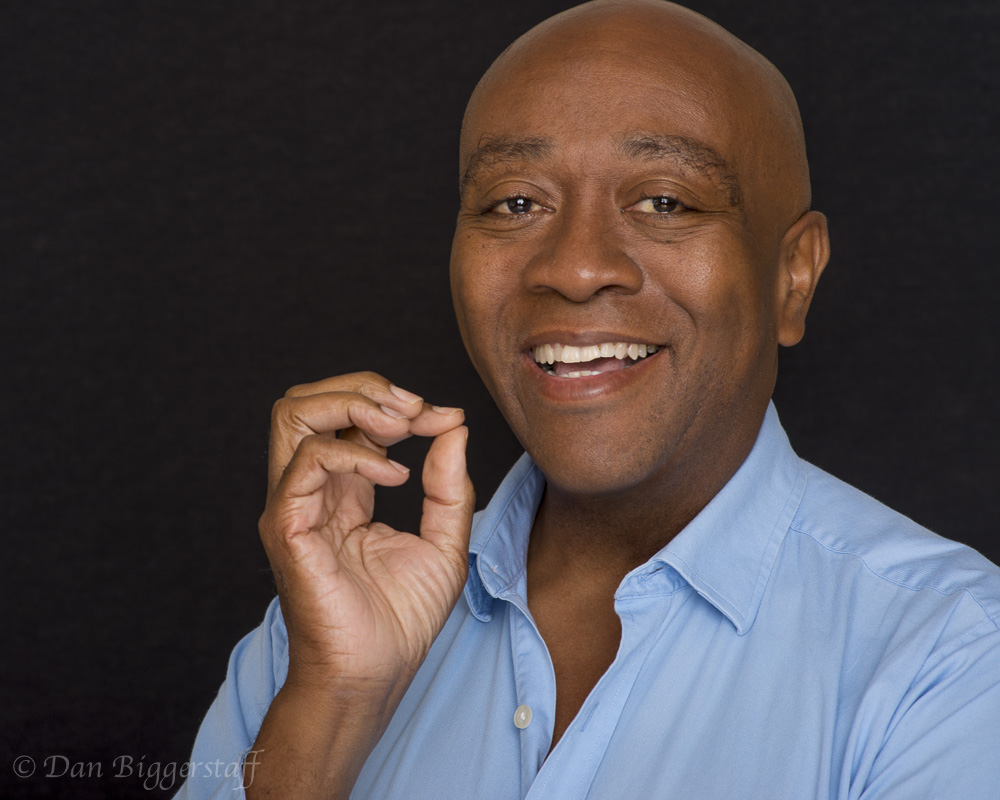
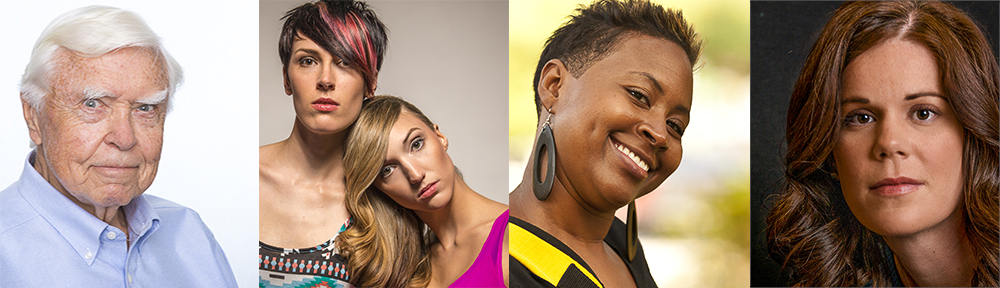
Here are a few more headshots showing different lighting and backgrounds.


Copyright Dan Biggerstaff Photography. All Rights Reserved © 2018

TRAVEL PHOTOGRAPHY – SCOTLAND

Castle-001

Travel photos can be easy or a challenge. My wife and I were fortunate to recently go to northern Scotland, a destination to which we had not previously traveled. In writing this blog, my initial plan was to describe history and details about the locations, etc. Since this is a photography blog, I thought this would be BORING.  This is an abbreviated account of the trip. By the way, over time I will be printing and framing select photos from the trip to hang in my office and make available for sale. Come by and take a look.

The first few shots were street scenes in Inverness where the trip began. The River Ness can be seen in several. The river is connected with a series of locks to the Loch Ness, the home of the famed Monster. Just for fun, I took a double exposure (in the camera, not manipulated in Photoshop) of ornamental branches decorated with holiday lights superimposed over bottles of scotch whisky on glass shelves; the location was a restaurant where we had lunch. The best way to see the photos is to click on the first and use the “right arrow” to view at your own pace. If a gallery contains more than 20 photos, close the last photo and go to the next section in the gallery – a little bit of trouble but worth the effort.

The Lord of the Glens, a small passenger ship was our home for the next part of the journey. At the end of Loch Ness, our next overnight stop was in Fort Augustus. Then, we sailed through Loch Lochy, south of Loch Ness, before going into the North Sea with stops in the Inner Hebrides, islands off of the northwest coast of Scotland. The photos show the scenery as we passed, as well as other passengers and crew on board the ship, and a few local animals. We docked every night affording opportunities to see local attractions. Some destinations did not have facilities to dock, in which cases we rode local ferries.

Comments about a few of the photos: One photo is taken from the interior of the ship looking out into Loch Ness. The next is of Castle Urquhart, a favorite spot for Nessie sightings. One of the crew celebrated his birthday during the trip and got kisses from two of his attractive crew-mates. At one of the many castles we saw, a group of children were playing, and I could not resist a photo of this darling. The photo of a man cutting the grass is boring except for the fact that he had on a tie. Pictures of food (this of a delicious dessert on board ship) can always add interest to documentation of travel. I had to include a photo of a scotch whisky distillery in Scotland. A couple of things about scotch – the first is that it is called whisky and not scotch in the British Isles. The second is that it is enjoyed with just a wee bit of distilled water added and not over ice.

Comments about travel photography: it is hard to travel with and use off-camera lighting such as big studio strobes, and photos taken with popup flash usually look like a flash picture – not desirable. The best alternative is to use available light which means having a camera with a high speed sensor (I shot some photos at ISO 6400) and/or having a light-weight tripod. Another concern when doing travel photography is what lenses to bring. On a trip a few years ago, my photo backpack weighed 45 pounds – I will never do that again. A mentor of mine, Jay Maisel, famously states “the more lenses you have, the fewer pictures you will take.” On this trip, I had a 27-300 mm f3.5-5.6 lens and a 45 mm f2.8 tilt-shift lens. I used the second lens very little.

Back to comments about photos: some photos should document location. The Old Forge Inn in Inverie is the remotest pub and restaurant on the British mainland. Marshall and a number of other passengers (including me) on the ship enjoyed the refreshments and comradery the inn had to offer. The only way to and from the location is by boat or a 16 mile hike from Kinlochourn. The only photo in this series I did not take was one of me and my wife when I asked a passerby to take the photo. On the next leg of the trip, a Viking Longboat from Denmark crossed our bow.  Then, the trip onboard the ship was celebrated with a farewell dinner. We were served haggis; the rest of the meal was delicious. If you are not familiar with haggis, it is a combination of sheep’s heart, liver, and lungs with onion, oatmeal, and a few other ingredients that is encased into the stomach and cooked for several hours. The photo with the knife shows it being sliced in a celebratory fashion to serve at our dinner.

A photo taken in a restaurant in Edinburgh shows the beginning of the last leg of the trip. There are a number of photos of the famed Edinburgh Castle, both from a distance and on the castle grounds. The Edinburgh Military Tattoo is an annual celebration of music and entertainment that brings together thousands of people from all over the world with no lack of pomp and ceremony. It concludes with a phenomenal fireworks display. The remaining photos were taken in Edinburgh, including the one of the bow of The Royal Yacht Britannia, shot through a “porthole.” Enjoy!

All photos copyright  Dan Biggerstaff Photography. All rights reserved © 2014

MOTIVATING THE PRACTICAL

Making the lighting of a subject look like it is coming from lights in the scene is a phrase used in the film industry and is called “motivating the practical.” Another form of lighting is to create a desired effect just for the sake of lighting the subject in a certain way. The worst type of lighting for photographs is on-camera flash which gives the classic “deer in the headlights” look. If you are using electronic flash, get the source off of the camera.

I recently attended a photography workshop conducted by Gregory Heisler. An on-line search of Mr. Heisler will result in numerous links, well worth your time for those interested in portrait photography. His work is amazing! Purchasing a copy of his book, 50 Portraits, is a small investment for the wealth of information you will receive. In addition to the amazing photographs, he provides interesting personal information about his famous subjects and thoughts on technique in each photo.

Greg was the one who introduced the phrase “motivating the practical” to me. Other concepts he promotes in photography include trying not to take the same photograph twice, whether it is one of his own or one that he has seen before. In fact, the only photographs he has on the walls of his studio and home are those of his girls. Once he has taken a photograph, he moves on to something else. When taking a photograph, he frequently frames the picture in the camera and then composes the content.

The light source(s) for a photograph can be divided into continuous and flash. Each has its advantages and disadvantages. The scope of this blog does not allow a detailed discussion of lighting, but continuous light sources allow you to see what you are getting. On the other hand, flash may emit a stronger light and is able to freeze motion. You may have to click on View Images at the bottom of the page to see these photos.

This photograph was taken using a tungsten bulb in an inexpensive reflector ($7.95) placed on the old-fashioned stove in front of the model. Our assignment was to photograph our model as an artist, musician, or writer. With my passion for cooking, the model was portrayed as a chef for a magazine cover.

Chef-001


The lighting for this scene was ambient light coming through the door behind the model, along with a two-bulb fluorescent fixture purchased a local home-supply store. The vertical fluorescent bulbs were on a stand to the left of the model.

Bedtime-001


Rules are meant to be broken, so I did in this photo. The location for the shoot was a deserted power plant. The subject in this photo was a friend of a model who was on location at the shoot. I asked if she would mind being photographed, and she graciously agreed. At this point, my group was having technical difficulties with our studio flash, so I put the SB910 flash on my camera with a modifier called a RoundFlash. The RoundFlash effectively converts an on-camera flash to a ring light. This light is best used as a fill light, but I chose to use it as the primary light source in this photo.

Power Plant-001


The last photo was taken on the second floor of a federal penitentiary that was closed many years ago. A gelled-studio strobe was on the first floor angled up to create the shadow of the bars and of the model on the ceiling. The camera was hand-held, and two images were made on the same frame in the camera. I envisioned this image on the cover of a CD album for a rock star. This “look” is not something I typically shoot but was just having fun.

Prison-001

All photos copyright  Dan Biggerstaff Photography. All rights reserved © 2014

Purpose of a Photograph

We take photographs for many different reasons. If the photo is for commercial purposes, the “look” will be different than ones taken for documentary or art or editorial purposes. These two photographs were the selections from hundreds to be used as advertisements for a hair and styling salon.

Monica McMasters owns B Street Salon here in Savannah and needed photos to make vertical banners for a trade show. Monica was a stylist for Paul Mitchell in California and brought her talents with her when she moved back to her home in Savannah. Her husband, John, did the graphic design for the banners. Professional models from Halo were used for the shoot, and Monica and her B Street team did the hair and makeup.

The shoot was done in studio with a Nikon D800 and a 24-70mm f2.8 lens. A white backdrop was chosen to give a clean look, and a 30” beauty dish served as the main light.  Profoto D1 1000ws strobes were used for lighting.

Models-001


Benefits of Photography

What photography can do is limitless, for both the photographer and the viewer of the photographs. The obvious thing it does is to capture the moment, whether an abstract, a beautiful landscape, a portrait, or whatever.  A photograph may be a true work of art that gives its viewers the things art can provide.  Photography can occupy time (whether it is a hobby or a profession), can be therapeutic for the onlooker or the person behind the camera, can give pleasure or pain, and can elicit the gamut of emotions.

Recently, I was invited to attend and take candid photographs at a rehearsal for The Savannah Children’s Choir.  The Choir is community-based, represents many ethnic and socioeconomic groups, and provides its children an opportunity to participate in activities with many benefits beyond the song (go to www.savannahchoir.org).  Over 80 children from the 2nd through 7th grades were at the rehearsal.  I was floored with what I heard and saw. (I have attended a couple of their concerts prior to the rehearsal which were wonderful.) Emmy Williams, Director of Education, conducted the rehearsals with the support of a number of other adults.  The children were well-behaved, noticeably had fun, and sounded great, as Ms. Williams guided them through the practice – all, while they are learning.  If most of our teachers had the obvious expertise and commitment that she does, America would be at the top of all education lists.

You may be reading asking yourself “what does this have to do with photography?” Photography enabled me to observe something very special I would have otherwise not seen.  I was given a gift. These are photographs of one of the younger and one of the older members of the choir.

SCC-001 SCC-002


Importance of Printing

Most of the millions of photographs taken daily never see the print side of paper or canvas.  It is so easy to view photos on the many digital devices most of us have; but, are we missing something? My answer to that is an overwhelming yes! I would take it a step further and say the best of the photos should not only be printed but should also be framed, or at least put in a photo album or maybe even published in a book.  Online publishers, such as Blurb.com and others, make it easy and affordable to publish your photos in a book.

Let’s say you want to print and frame a group of photos.  My advice is to go to a local photography store and work with whomever is doing the printing. Here is Savannah my favorite is Peter at Worldwide Camera, who has the expertise to make the photos “pop” when printed. He is also really good with Photoshop and is willing to work with you to do the editing you need.

The next part of the project is to have the photos framed. I have chosen to get my frames online at American Frame.  There are many other reputable companies but I have gotten good results from this company.  You choose the size(s), the specific frame(s), the glass, mat board, and the mounting board.  You have to then frame the photograph which takes a little work but saves about 50% over taking the photo to a local framing store. If you are not interested in doing the framing, take the photo(s) to a local framing store.

Finally, make sure you hang the photos so you and others can enjoy your work.  This is a photo I took recently of a friend, had it Photoshopped and printed by Peter, and is waiting to be framed. Can’t wait to see the final result.  The print is gorgeous!

Monica-001

Portraits and Headshots

Since much of my commercial photography is now portraits and head shots, I have added a new main category to my website. Check it out by clicking on Portraits under the banner for the site. The following is one of the portraits included in the new category. This is Roger Moss who is the Director and one of the founders of the Savannah Children’s Choir. He is delightful to work with, obviously very expressive, and has a gorgeous baritone voice.

Roger-001

Voluntary or Involuntary Expression

Never say cheese! When photographing a person, the “deer-in-the-headlights” look is a guarantee when saying “cheese” or asking the client to “smile.” To remedy this situation, there are two choices: catch the person with spontaneous/involuntary expression without them being aware of the photograph being taken. The other option is to pose the client and distract them with direction and meaningful, or not, chatter; the result is involuntary expression.

The devil is in the details – not the first time I have said that. Before the actual shoot, a number of things have already been done. Some of these include setting up the background, the lighting, choosing wardrobe, and someone being responsible for hair and makeup. Then the shoot begins.

Working with models and clients in a headshot or portrait shoot requires lots of practice – at least it has for me. I was nervous the first few times and found limited educational opportunities to learn how to direct someone I am photographing.  The online course taught by Peter Hurley (www.peterhurley.com) has been superb in doing just that. Once the client is in the “sweet spot,” he or she is distracted by chatter so they forget they are in front of a camera. And “SHABANG” as Peter would say, we have a photograph.  Simple, no, but doable. This is a self-portrait that was an assignment for the course.

Dan-001

New Bio

Lewis-001No, this is not the latest photo of me, but I would say this is a really handsome guy. It is a recent headshot photo I took of my second cousin, while visiting him in New Bern North Carolina. Uncle Lewis, as I call him, is a really nice person and a delight to be with. A big, hearty thanks to him for letting me do the photo session.

The first assignment we had in the Peter Hurley Headshot Intensive Online Course I am taking was to write a bio. This is what I posted for the assignment and will be posted in the About Me section of the website.

Bio Revised

Having two jobs I love, gynecology and photography, is a blessing. The photographer in me actually started about the same time as the doctor in me. A manual film camera, purchased during my senior year of medical school, was my first “real” camera. As a side note, my father thought it was an exorbitant purchase for a medical student and shamed me into taking it back to the store; as I recall it cost about $120. Thinking about the situation upset me, and shortly I returned to the store and repurchased the camera. I reassured the salesman that I would not be back for another return. From a photography standpoint, I have never looked back.

My training in obstetrics-gynecology was done in the U.S. Army, along with a few years of pay-back service. My medical practice became gynecology-only many years ago, allowing more time to pursue other interests. Several years of active duty in the Army in southern Germany provided an opportunity to travel and take lots of photographs.  I married my wife, Elisabeth, during medical school, and we had our two children, a daughter and son, during my residency training. We now have four grandchildren that provide great photography subjects, well most of the time.

Before I became really serious with photography, my spare time was spent with both fresh and salt water fly fishing, sailing, and a smidgen of Bluegrass fiddle. In order to spend more time with my children while they were growing up, a private pilot’s license allowed me to attend out-of-town ballet performances and away swim meets. The private-pilot thing was no small feat since I have a fear of heights. That’s another story for another time. These activities have been almost totally replaced by my passion for photography. I have to eat, so my other hobby, gourmet cooking remains intact, with northern Italian being my favorite cuisine.

I wanted to move from the level of serious amateur to professional in photography.  A pro- photographer friend suggested I take thousands of photos and be my own strongest critic. Street photography became my passion, making it easy to take a gazillion photos of a variety of subjects. It was easy to move from street photography to women’s fashion, the next stop in my photographic journey. But realizing I could not shoot women’s fashion professionally in my hometown of Savannah, Georgia, I am having a blast with portrait and headshot photography.  I jokingly say “I have not decided what I am going to do when I grow up.” Just having fun!

Connection skills, learned both as a physician and photographer, enable me to give my clients photographs that characterize who they are. Now that you know something about me, please call and give me the opportunity to get to know you and take your portrait/headshot photo that will elicit a “like who you see” response!

The Devil Is In The Details


It has been a long time since I added a post to the blog. If there is anyone out there who is reading this, a sincere thanks.  I promise to be more attentive in 2013.

This is a photo used in a newspaper article promoting an upcoming fashion show. This is not the first time I have addressed the importance of the details of a shoot.  Most of the time, the “details” begin before the photographer is even asked to do a shoot.  For instance, I have been working for several months on the upcoming fashion show, The Art of Great Fashion, which will be held on January 21, 2013 here in Savannah at The Landings’ Plantation Club. The theme for the show, Carnevale!, was chosen because of a current exhibit at the museums of old art from the Uffizi Gallery in Florence, Italy. I have done several shoots for marketing materials for the show and am getting ready for the actual show itself.  Several nights ago, I photographed carnival masks for a promo article in the local newspaper. This is a link the article: http://savannahnow.com/accent/2013-01-04/sense-fashion-art-great-fashion-carnevale#.UOgG2o7m594.

Back to the story. The reason I did this latest shoot is the chair of marketing for the event contacted a fashion writer for our local newspaper and asked if she would run a story about the fashion show. Once that was agreed upon, it had to be decided whether to use just photos of previous fashion shoots or whether to try to get new photos to add interest and attract attention to the event. There was an informal meeting with the fashion writer, the owner of the boutique providing the clothes for the show, a stylist, and me, the photographer. The more people involved, the more details are involved – which can be good or bad, or both – you get the gist.  Since the theme for the show was Carnevale!, it was decided to photograph the masks for the newspaper article, in addition to the fashion photo above. Of course time was getting short, as it frequently is with these projects. The afternoon, then into the night, before the photos were needed, the shoot happened. I had two stylist/assistants who were life(photo) savers. Always thank your help. We worked several hours photographing one mask and finally gave it up as a hopeless cause and then photographed several more masks. Specifics of the shoot: I was using a Nikon D700 with a 50 mm f1.4 lens, ISO 100, 1/160 sec, f4.0 on the first mask, and f8.0 on the second mask, with two SB900 speed lights (on manual controlled with Pocket Wizards) shot through medium softboxes, angled from both sides over-head. The reflections of the softboxes from the glass over the art were cropped from the edges of the photo. My tethered shooting lasted for a short time; I switched to CF card when I lost the connection to save time. As Joe McNally is fond of saying, “things happen at shoots.” These are the end results.