Before and After

Sophia-001

This is a photo of a beautiful woman. One of my mentors, Jay Maisel (www.jaymaisel.com), states  the components of a great photograph are light, color, and gesture. I would add DETAIL to the components. Jay would probably comment that detail goes without saying. I am certainly not going to argue with him but will make several points.

Do as much as you can in the camera, cropping, exposure, bokeh, etc. When photographing people, good hairstyling and makeup before the shoot make post-editing a lot easier. Unfortunately, the time for or availability of a hairstylist and makeup artist is not always there. That is where post-shoot editing comes into play. I use Lightroom® and Photoshop® but admit my skills with the latter are limited. The “automatic” software for editing portraits usually gives a Barbie Doll® look that is not my preference.

I have chosen to seek out someone with the knowledge and experience I do not have for editing. Peter Bergeron (petertbergeron@gmail.com) has the skills and talent to meet my needs for “serious” editing. Peter has a Master’s Degree from SCAD and has been editing and printing photos for many years. The following are BEFORE and AFTER closeups of the above photo, thanks to Peter.

BeforeAfter


Copyright Dan Biggerstaff Photography. All rights reserved © 2016


Get the Flash Off of the Camera

Yesterday afternoon, I was walking along The Bluff near my home. The Bluff is a half-mile stretch of narrow street that runs along The Intercoastal Waterway with the water and docks on one side and homes on the other – old oaks with moss create a mystical canopy over the road, one of the most beautiful settings in Savannah. Now that you get the picture, a photographer was taking informal portraits of a couple before their prom – with an on-camera, pop-up flash for fill.

Unfortunately, on-camera flash of people frequently results in a “deer in the headlights” look – not the most appealing. There are exceptions to this including the use of a ring light for fill or using an on-camera speed-light bounced off of a reflecting surface such as a wall. Taking great outdoors photos of people requires finesse. The camera is first set with ISO, speed, and aperture  for the background and surroundings, best done in manual mode. Frequently, bokeh is used to bring attention to the main subject. Bokeh is the aesthetic quality of blur produced in the out-of-focus parts of an image. See my post on January 4, 2016 for an explanation of High-speed Sync Flash. This photo seen in my post is a good example of bokeh.

 Portrait of a Beautiful Lady


Portrait of a Beautiful Lady

Lets assume the camera is set for the background – frequently underexposed, again to help bring attention to the main subject(s). The classic position for the main light is 45 degrees to one side or the other and 45 degrees angled down on the subject. This results in the classic Rembrandt look with the shadow of the nose not quite touching the upper lip. Additional lights may be used for fill or to separate the subject from the background. Various reflectors may be used in addition to or in place of strobes. My favorite main light source when photographing people is to bounce a Profoto head (D1 or B1) into a silver 42″ umbrella and back through a 7′ diffusing umbrella. This set-up can be challenging if there is any wind. This is an example of a recent headshot using only this set-up on a black backdrop.

Mom-001


Copyright Dan Biggerstaff Photography. All rights reserved © 2016


HIGH-SPEED SYNC FLASH

 Portrait of a Beautiful Lady


Portrait of a Beautiful Lady

For a moment, back to basics. The amount of light that reaches the sensor in DSLR’s (digital single lens reflex cameras) is controlled by the ISO, f-stop, and shutter speed. Most DSLR’s have a maximum sync shutter speed of 1/250th of a second – that is the fastest shutter speed to be able to take a photograph using flash. Some cameras allow the shutter speed to be set at higher speeds using HSS (high-speed sync), which can freeze action in the background, reduce the brightness of the background, and/or enable the photographer to use lower f-stops to blur the background. (For the purpose of this discussion, I am assuming both the camera and flash are set on manual mode, not automatic or TTL –  TTL is a mode some flashes have that allow the flash to automatically control the light output of the unit. Also, when changing the shutter speed or f-stop, let’s assume the other remains unchanged.)

For HSS photography, the other component needed is a HSS-capable flash, whether it be a speed light or studio-style strobe. Both Nikon and Canon have speed lights that can be used with HSS, and Profoto makes studio strobes which can be used for HSS when more light is needed for the photo. This is not a complete list of all brands that provide these products. For a more technical explanation of HSS, go to http://neilvn.com/tangents/high-speed-flash-sync/.

More basics. When using flash, the f-stop controls the brightness of the subject lit by the flash (with a given light output), and the shutter speed controls the brightness of the background. Because of the inverse-square law (light falls off quickly), flash will have little or no effect on the brightness of the background unless the background is very close to the subject being lit by the flash.

The photograph above was taken in open shade on a bright sunny afternoon. I put the subject in open shade so she would not squint, dropped the f-stop to blur the background, and increased the shutter speed to darken the background. A beauty dish and a Profoto B1 strobe was used to light the subject. The camera settings were ISO 200, f-stop 6.3, and a shutter speed of 1/1600th of a second. I was using a Nikon D800 with a 70-200mm lens at 200mm. At a given ISO (and same shutter speed), decreasing the f-stop (say to f2.8) would have caused the background to blur even more and would have required less output from the flash. If the f-stop was increased to f16.0, the background would have been more distinct, and more power output from the flash would have been required to light the subject. If the shutter speed (with a stable f-stop) was decreased to 1/250th of a second, the background would have been blown out (way over-exposed). Increasing the shutter speed to 1/6000th of a second would have made the background considerably darker.

Copyright Dan Biggerstaff Photography. All rights reserved © 2015

MOTIVATING THE PRACTICAL

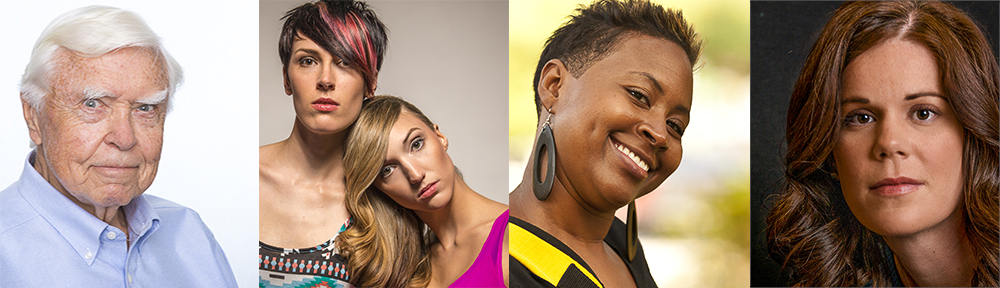
Making the lighting of a subject look like it is coming from lights in the scene is a phrase used in the film industry and is called “motivating the practical.” Another form of lighting is to create a desired effect just for the sake of lighting the subject in a certain way. The worst type of lighting for photographs is on-camera flash which gives the classic “deer in the headlights” look. If you are using electronic flash, get the source off of the camera.

I recently attended a photography workshop conducted by Gregory Heisler. An on-line search of Mr. Heisler will result in numerous links, well worth your time for those interested in portrait photography. His work is amazing! Purchasing a copy of his book, 50 Portraits, is a small investment for the wealth of information you will receive. In addition to the amazing photographs, he provides interesting personal information about his famous subjects and thoughts on technique in each photo.

Greg was the one who introduced the phrase “motivating the practical” to me. Other concepts he promotes in photography include trying not to take the same photograph twice, whether it is one of his own or one that he has seen before. In fact, the only photographs he has on the walls of his studio and home are those of his girls. Once he has taken a photograph, he moves on to something else. When taking a photograph, he frequently frames the picture in the camera and then composes the content.

The light source(s) for a photograph can be divided into continuous and flash. Each has its advantages and disadvantages. The scope of this blog does not allow a detailed discussion of lighting, but continuous light sources allow you to see what you are getting. On the other hand, flash may emit a stronger light and is able to freeze motion. You may have to click on View Images at the bottom of the page to see these photos.

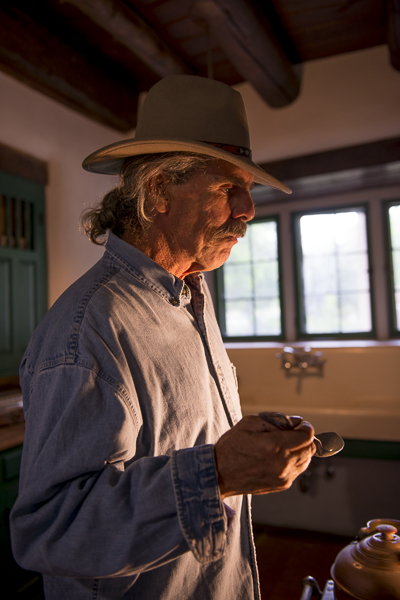
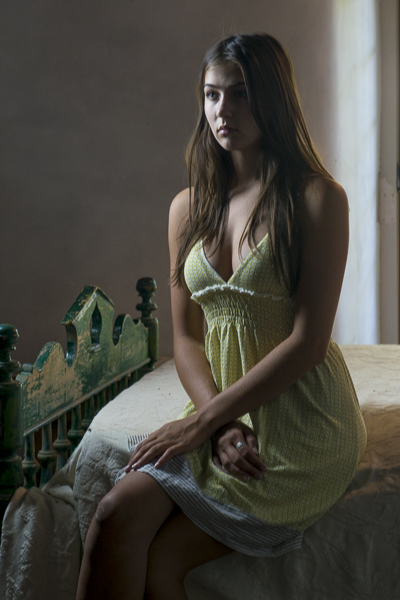
This photograph was taken using a tungsten bulb in an inexpensive reflector ($7.95) placed on the old-fashioned stove in front of the model. Our assignment was to photograph our model as an artist, musician, or writer. With my passion for cooking, the model was portrayed as a chef for a magazine cover.

Chef-001


The lighting for this scene was ambient light coming through the door behind the model, along with a two-bulb fluorescent fixture purchased a local home-supply store. The vertical fluorescent bulbs were on a stand to the left of the model.

Bedtime-001


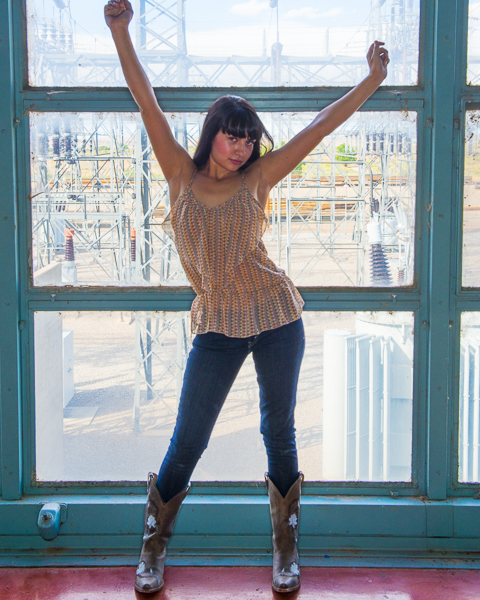
Rules are meant to be broken, so I did in this photo. The location for the shoot was a deserted power plant. The subject in this photo was a friend of a model who was on location at the shoot. I asked if she would mind being photographed, and she graciously agreed. At this point, my group was having technical difficulties with our studio flash, so I put the SB910 flash on my camera with a modifier called a RoundFlash. The RoundFlash effectively converts an on-camera flash to a ring light. This light is best used as a fill light, but I chose to use it as the primary light source in this photo.

Power Plant-001


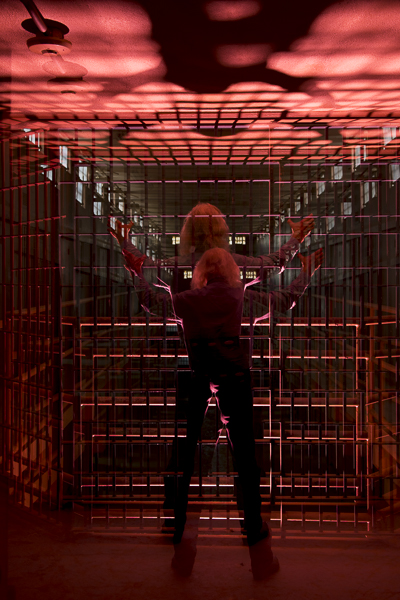
The last photo was taken on the second floor of a federal penitentiary that was closed many years ago. A gelled-studio strobe was on the first floor angled up to create the shadow of the bars and of the model on the ceiling. The camera was hand-held, and two images were made on the same frame in the camera. I envisioned this image on the cover of a CD album for a rock star. This “look” is not something I typically shoot but was just having fun.

Prison-001

All photos copyright  Dan Biggerstaff Photography. All rights reserved © 2014