Before and After

Sophia-001

This is a photo of a beautiful woman. One of my mentors, Jay Maisel (www.jaymaisel.com), states  the components of a great photograph are light, color, and gesture. I would add DETAIL to the components. Jay would probably comment that detail goes without saying. I am certainly not going to argue with him but will make several points.

Do as much as you can in the camera, cropping, exposure, bokeh, etc. When photographing people, good hairstyling and makeup before the shoot make post-editing a lot easier. Unfortunately, the time for or availability of a hairstylist and makeup artist is not always there. That is where post-shoot editing comes into play. I use Lightroom® and Photoshop® but admit my skills with the latter are limited. The “automatic” software for editing portraits usually gives a Barbie Doll® look that is not my preference.

I have chosen to seek out someone with the knowledge and experience I do not have for editing. Peter Bergeron (petertbergeron@gmail.com) has the skills and talent to meet my needs for “serious” editing. Peter has a Master’s Degree from SCAD and has been editing and printing photos for many years. The following are BEFORE and AFTER closeups of the above photo, thanks to Peter.

BeforeAfter


Copyright Dan Biggerstaff Photography. All rights reserved © 2016


Get the Flash Off of the Camera

Yesterday afternoon, I was walking along The Bluff near my home. The Bluff is a half-mile stretch of narrow street that runs along The Intercoastal Waterway with the water and docks on one side and homes on the other – old oaks with moss create a mystical canopy over the road, one of the most beautiful settings in Savannah. Now that you get the picture, a photographer was taking informal portraits of a couple before their prom – with an on-camera, pop-up flash for fill.

Unfortunately, on-camera flash of people frequently results in a “deer in the headlights” look – not the most appealing. There are exceptions to this including the use of a ring light for fill or using an on-camera speed-light bounced off of a reflecting surface such as a wall. Taking great outdoors photos of people requires finesse. The camera is first set with ISO, speed, and aperture  for the background and surroundings, best done in manual mode. Frequently, bokeh is used to bring attention to the main subject. Bokeh is the aesthetic quality of blur produced in the out-of-focus parts of an image. See my post on January 4, 2016 for an explanation of High-speed Sync Flash. This photo seen in my post is a good example of bokeh.

 Portrait of a Beautiful Lady


Portrait of a Beautiful Lady

Lets assume the camera is set for the background – frequently underexposed, again to help bring attention to the main subject(s). The classic position for the main light is 45 degrees to one side or the other and 45 degrees angled down on the subject. This results in the classic Rembrandt look with the shadow of the nose not quite touching the upper lip. Additional lights may be used for fill or to separate the subject from the background. Various reflectors may be used in addition to or in place of strobes. My favorite main light source when photographing people is to bounce a Profoto head (D1 or B1) into a silver 42″ umbrella and back through a 7′ diffusing umbrella. This set-up can be challenging if there is any wind. This is an example of a recent headshot using only this set-up on a black backdrop.

Mom-001


Copyright Dan Biggerstaff Photography. All rights reserved © 2016


CONTINUING EDUCATION

Many photographs since my last post. Looking back over the past year, I was fortunate to be able to photograph a number of subjects ranging from portraits and an opera to weddings, family get-togethers, concerts, and a museum exhibition. As with any skill, doing something regularly improves quality as does working with others in the same field, along with continuing education. In my other profession, gynecology, I always learn when working with other physicians in the operating room. The same thing applies to photography. A few times a year I try to attend photography workshops, forums and meetings.

My first workshop last year was in California with a world-renown portrait photographer, Greg Gorman, who is known for his celebrity photography. We spent the week photographing two models along the dramatic backdrop of the Northern California Coast. I must say the food and wine in the evenings was a great way to end the long days – Greg has his own personal chef, owns his own winery. There were 10 photographers attending the workshop with skill levels from advanced amateur to professional. We were divided into two teams of five photographers, to assist each other with lighting and setup. My wife and I were in a team with a husband, wife and daughter. The husband was Thomas Knoll; for those of you not familiar with Thomas, he wrote the original programs for Photoshop and Lightroom. He was very laid back, quiet, and fun to work with (as were his wife and step-daughter). As if that was not enough “celebrity among us,” Yaniv Gur was on the other team. Yaniv is the Senior Director of Engineering for Apple. A really fun and educational week! These are a few photographs of mine from the week. The first is of Thomas Knoll, then a few of the models, having fun at a winery, and finally an evening at Greg’s home.


The next workshop we attended was The D-65 Lightroom Workshop. It is put on by Seth Resnick and his wife, Jamie Spritzer. Seth was the second pro presenting at the portrait workshop with Greg Gorman in California. Although most photographers find Lightroom much easier to use than Photoshop, using Lightroom correctly requires more knowledge than meets the eye. Internationally-know portrait photographer, Gregory Heisler, calls the D-65 Workshop a must do. I humbly agree with Greg. There were a total of 9 photographers attending this workshop, one for the fourth time. I could see going back for a refresher in a few years. By the way, Seth is quite a wine connoisseur and knows his way around the kitchen. The next to last night night, he and Jamie presented an elegant, delicious, and decadent dinner – need I say more. This is a photo I took of Seth, along with one of the many dishes presented that evening.

Seth-002


Seth-001


Copyright Dan Biggerstaff Photography. All rights reserved © 2016

HIGH-SPEED SYNC FLASH

 Portrait of a Beautiful Lady


Portrait of a Beautiful Lady

For a moment, back to basics. The amount of light that reaches the sensor in DSLR’s (digital single lens reflex cameras) is controlled by the ISO, f-stop, and shutter speed. Most DSLR’s have a maximum sync shutter speed of 1/250th of a second – that is the fastest shutter speed to be able to take a photograph using flash. Some cameras allow the shutter speed to be set at higher speeds using HSS (high-speed sync), which can freeze action in the background, reduce the brightness of the background, and/or enable the photographer to use lower f-stops to blur the background. (For the purpose of this discussion, I am assuming both the camera and flash are set on manual mode, not automatic or TTL –  TTL is a mode some flashes have that allow the flash to automatically control the light output of the unit. Also, when changing the shutter speed or f-stop, let’s assume the other remains unchanged.)

For HSS photography, the other component needed is a HSS-capable flash, whether it be a speed light or studio-style strobe. Both Nikon and Canon have speed lights that can be used with HSS, and Profoto makes studio strobes which can be used for HSS when more light is needed for the photo. This is not a complete list of all brands that provide these products. For a more technical explanation of HSS, go to http://neilvn.com/tangents/high-speed-flash-sync/.

More basics. When using flash, the f-stop controls the brightness of the subject lit by the flash (with a given light output), and the shutter speed controls the brightness of the background. Because of the inverse-square law (light falls off quickly), flash will have little or no effect on the brightness of the background unless the background is very close to the subject being lit by the flash.

The photograph above was taken in open shade on a bright sunny afternoon. I put the subject in open shade so she would not squint, dropped the f-stop to blur the background, and increased the shutter speed to darken the background. A beauty dish and a Profoto B1 strobe was used to light the subject. The camera settings were ISO 200, f-stop 6.3, and a shutter speed of 1/1600th of a second. I was using a Nikon D800 with a 70-200mm lens at 200mm. At a given ISO (and same shutter speed), decreasing the f-stop (say to f2.8) would have caused the background to blur even more and would have required less output from the flash. If the f-stop was increased to f16.0, the background would have been more distinct, and more power output from the flash would have been required to light the subject. If the shutter speed (with a stable f-stop) was decreased to 1/250th of a second, the background would have been blown out (way over-exposed). Increasing the shutter speed to 1/6000th of a second would have made the background considerably darker.

Copyright Dan Biggerstaff Photography. All rights reserved © 2015

Headshots

Things happen. My latest blog post was completed, but not saved, on my desktop; and an automatic update program restarted my computer – blog post gone. I continue to learn, which is a good thing.

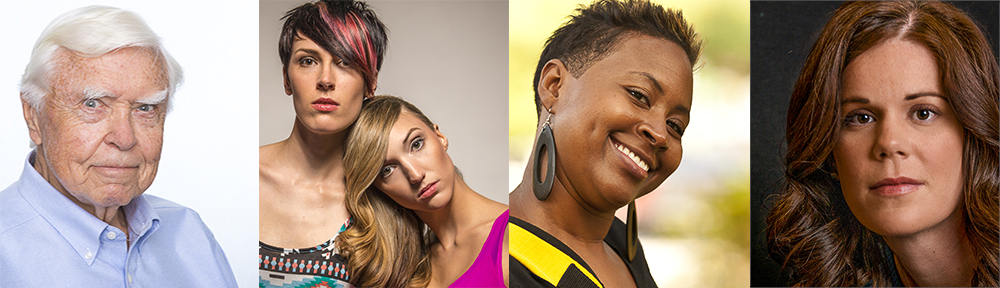
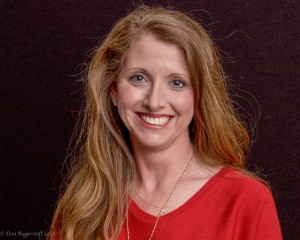
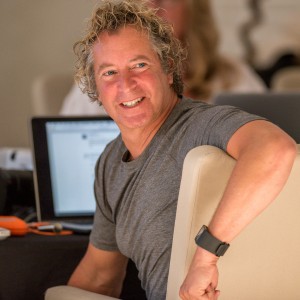
Even though I am considered a leader in the surgical treatment of endometriosis, anytime I go into the operating room with other physicians I always learn something. The same thing applies when I work with other photographers. I will soon be beginning a three month on-line headshot photography course and for the course need my own headshot.    Not having one that is current, I decided to use this as motivation to do a self-portrait. A self-portrait is something I have thought about doing for a long time – one of those things on the back burner.

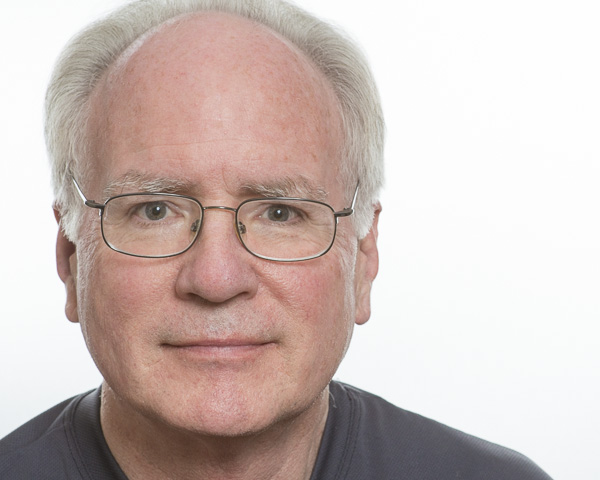
With my wife out of town and some extra time available, I spent a number of hours the first day with the set up and then the shoot itself. The particulars of the setup were my Nikon D800 on a tripod set at eye level, an 85 mm, f 1.4 portrait lens set on manual focus, a SB910 attached to a beauty dish and placed just behind and above the camera, a white collapsible backdrop lit on either side with two SB910’s with flags to prevent light spill, and a bar stool at a distance of about 5 1/2 feet from the camera. The camera settings were ISO 200, f 11.0, and 1/100.

If you have not taken a self portrait, it is an exercise I highly recommend to anyone photographing people. My shutter release cord is not long enough to reach from the camera to the stool, and my cordless remote had disappeared. The shutter release timer on the camera was set at 10 seconds, giving me just enough time to get to the stool, position myself, and strike a pose. Sit down at a 45 degree angle to the camera; then turn to the opposite side. Extend the chin towards the camera, no too much. Tilt the head to the left, no a slight tilt to the right looks better. Just a slight smile, not too much; it looks cheesy. Make the glasses are angled down to avoid the reflection of the flash. I had a feeling (that was definitely confirmed) that there is a huge difference between posing someone else and posing yourself.

My first efforts were the classic “deer in the headlights” look, highlighted with a cheesy grin – this is what Peter Hurley would term “out to lunch itis.” Peter is an internationally known headshot photographer who is teaching the above mentioned course.  I kept thinking “what would Peter be saying to me if he were taking the photo?”.   “Don’t look so miserable. Hint of a squint, hint of a smile, but stay serious, kick it up a notch.” For the next several days when I got home from my medical job, I spent a few minutes pushing the shutter, sitting on the stool, and trying to strike a pose Peter would approve of. Finally, I captured a photo that I hoped would elicit a “SHA-BANG” or exclamation of approval. Not perfect, but getting better.

 me-001

Looking and Seeing

You can take an average picture of an extraordinary thing or an extraordinary picture of an average thing.   Simply looking at a beautiful landscape is at one level, while seeing the many details of the picture in front of you is a much deeper level. The same concept applies to looking at a photograph and also to taking the photograph. A camera may simply be pointed at a scene and the shutter pressed, or very careful in-camera cropping may be used to include only those things desired and to exclude those not desired. Objects may be purposely added to or removed from, or even moved within the scene.  Lighting may be only available light or very elaborate artificial light.

These same ideas can be applied to photographing people. Pointing a camera and taking a simple snapshot of a person can record the moment. A more pleasing photograph can result from careful composition with attention to foreground and background and lighting. A great photograph may be captured of a spontaneous moment or may be staged and posed.  Most portraits are best made with careful consideration of the background and lighting along with posing the person being photographed. If the client is not a professional model or actor, talking continuously with the client to carefully adjust the pose in the photo will help take away the “deer in the headlights” look that many people get in front of a camera.

These are several photographs made during a shoot while my wife and I were in North Carolina baby-sitting our granddaughters to give their nanny a break. I thought the nanny looked gorgeous and asked if I could photograph her. She said she gets very nervous when having her photograph made but was not the least bit nervous when distracted by continual posing instructions. Don’t you think she looks great?! The best way to view the photographs is to click on an individual thumbnail.


Never Stop Learning

When assisting or being assisted by another surgeon, I always learn something new.  The same thing applies to photography.  Santa Fe, New Mexico (The Santa Fe Workshop) was the destination for a recent workshop on the use of small flash (speed light).  David Tejada, a friend from a prior photography workshop was outstanding as the leader of the event.  Most of you are aware of the options for lighting a photograph, so I will only touch on the highlights. If you are a pro, please skip to the photos and enjoy.

Ambient light, whether it be outdoors from the sun, or other source such as a fire, or indoors from tungsten or fluorescent bulbs or even from a candle, is the most commonly used source of light for photography.  Many well-known photographers such as Jay Maisel and Sue Bryce use ambient light almost exclusively.  Artificial light sources, when needed, come in many shapes, sizes and costs. The smaller units, detachable from the camera, are called speed lights. (The pop up flashes on many cameras are rarely used by professional photographers for lighting.)  The advantages of the speed lights are their small size and portability and the fact they do not have to be attached to a 110-120 volt electrical source. The major disadvantage of the speed light is the limited power (measured in watt-seconds) they produce. A good speed light can produce around 100 watt-seconds of power. This problem can be overcome to some degree by putting 2-4 speed lights (or more) together to increase the light output. One situation requiring extra light power is taking a photo in bright sunlight.  My first photograph below was taken in the early afternoon on a bright sunny day; I closed down my f-stop (f22) to make the picture appear as if it were taken at dusk.  In order to light Adam, the model, and to make it look like one light source, I taped two speed lights, one upside down on top of the other. Other situations would require a studio light with much more power.

Book and books have been written on lighting in photography.  Good on-line sources for lighting information are major manufacturers and distributors of lighting equipment such as:        http://www.profoto.com/blog/http://www.bhphotovideo.com/indepth/category/tags/lightinghttp://www.adorama.com/alc/, and http://fjwestcott.com/university/, just to name a few.

Here are a few of my photos from the workshop. One was taken in a studio and the others on location. You may recognize the church at Eaves Ranch, one of the most frequently utilized sets in Western movies. All but two of the photos were taken utilizing small flash for lighting.  The best way to view the photographs is to click on the first one and scroll through the rest.